
Product Information
How do you assemble a Mailer Box?
Are you unsure of how to assemble your corrugated mailer boxes, or want to make sure you're doing it right? Watch this video–it helps!
How to assemble a Mailer Box from Packlane on YouTube.
Prefer step-by-step instructions? These should help you get a great result:
1) Clear off a clean, flat work surface. Ideally, the surface should be larger than your un-assembled box sheet, so the sheet can sit flat and you're not bumping into other objects as you build the box. For best results, do not layer the boxes while folding, as this can damage the boxes underneath and result in poor creases in the box you're working on.
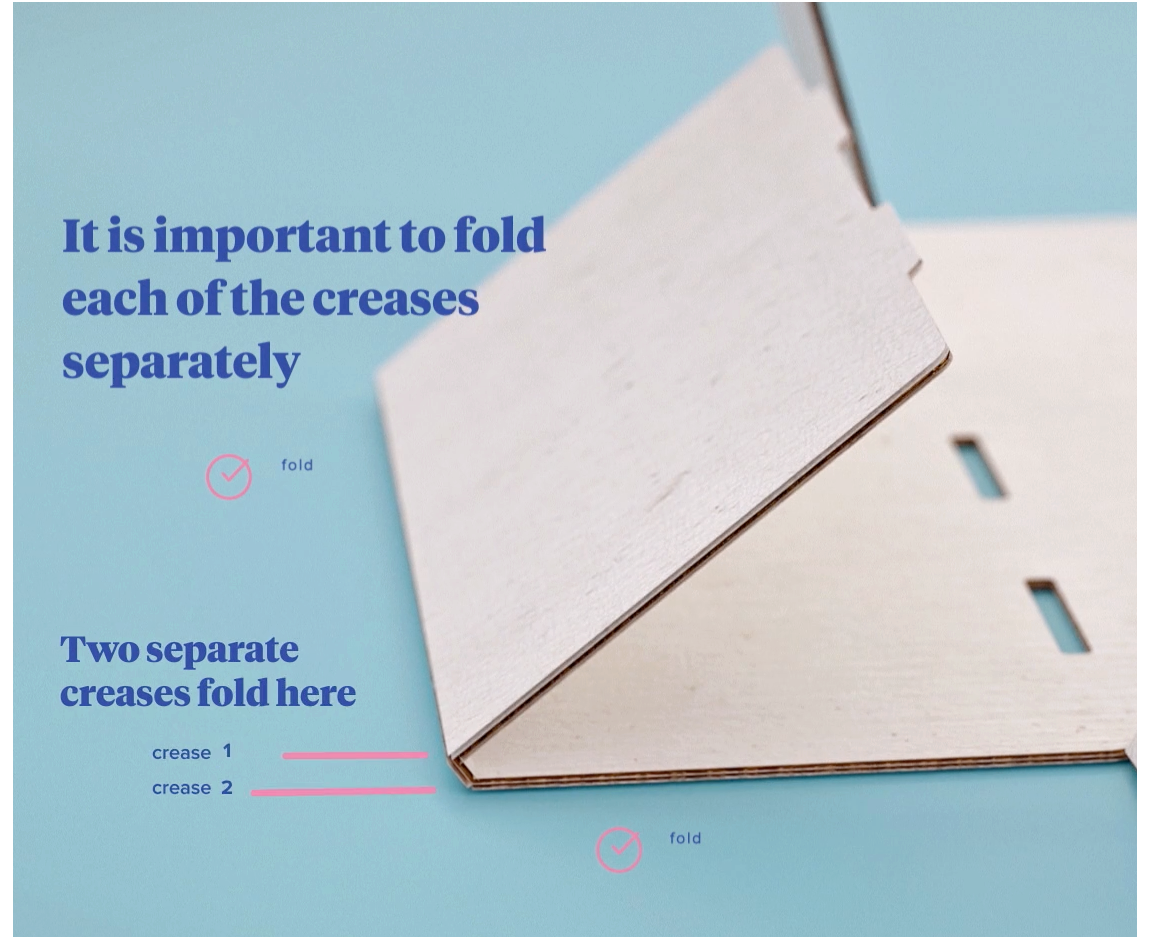
2) Look for the scores (pre-fold lines) on the interior side of your unassembled box. One by one, fold each score completely inward, then release it to lie flat on the table, interior facing up. This is called creasing, or "pre-breaking" the scores; it ensures that the actual folds will be sharp.
Please note: On the side flaps, two scores are very close together. You must take care to fold each crease separately. Otherwise, the side panel will seem too short on the inside, and the sidewall will not lock into the bottom.
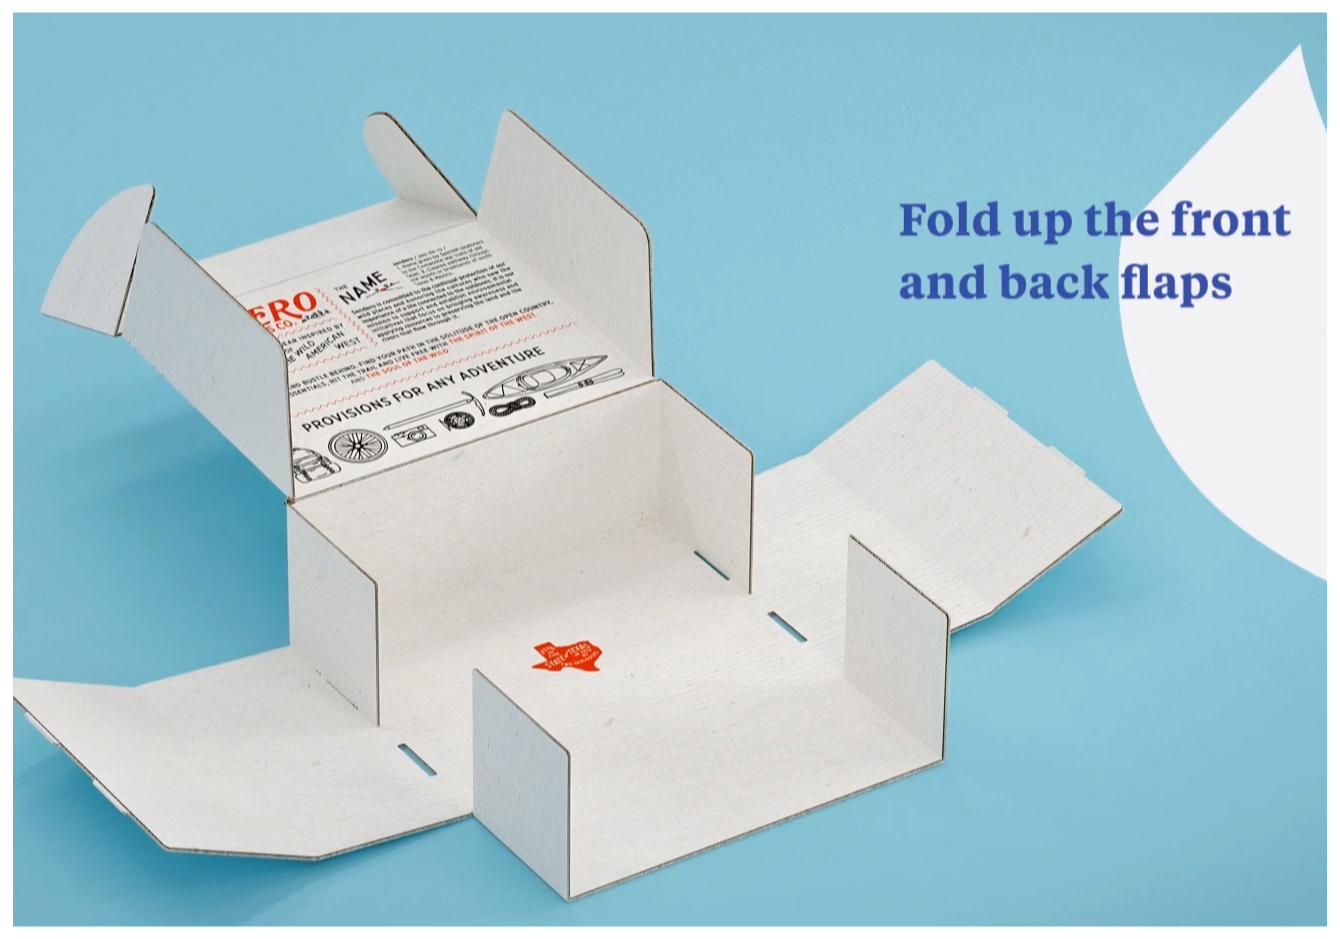
3) Fold up the front and back flaps, positioning the tuck flaps along the side of the box as much as possible. Lightly brace the back in place as you complete the next step.
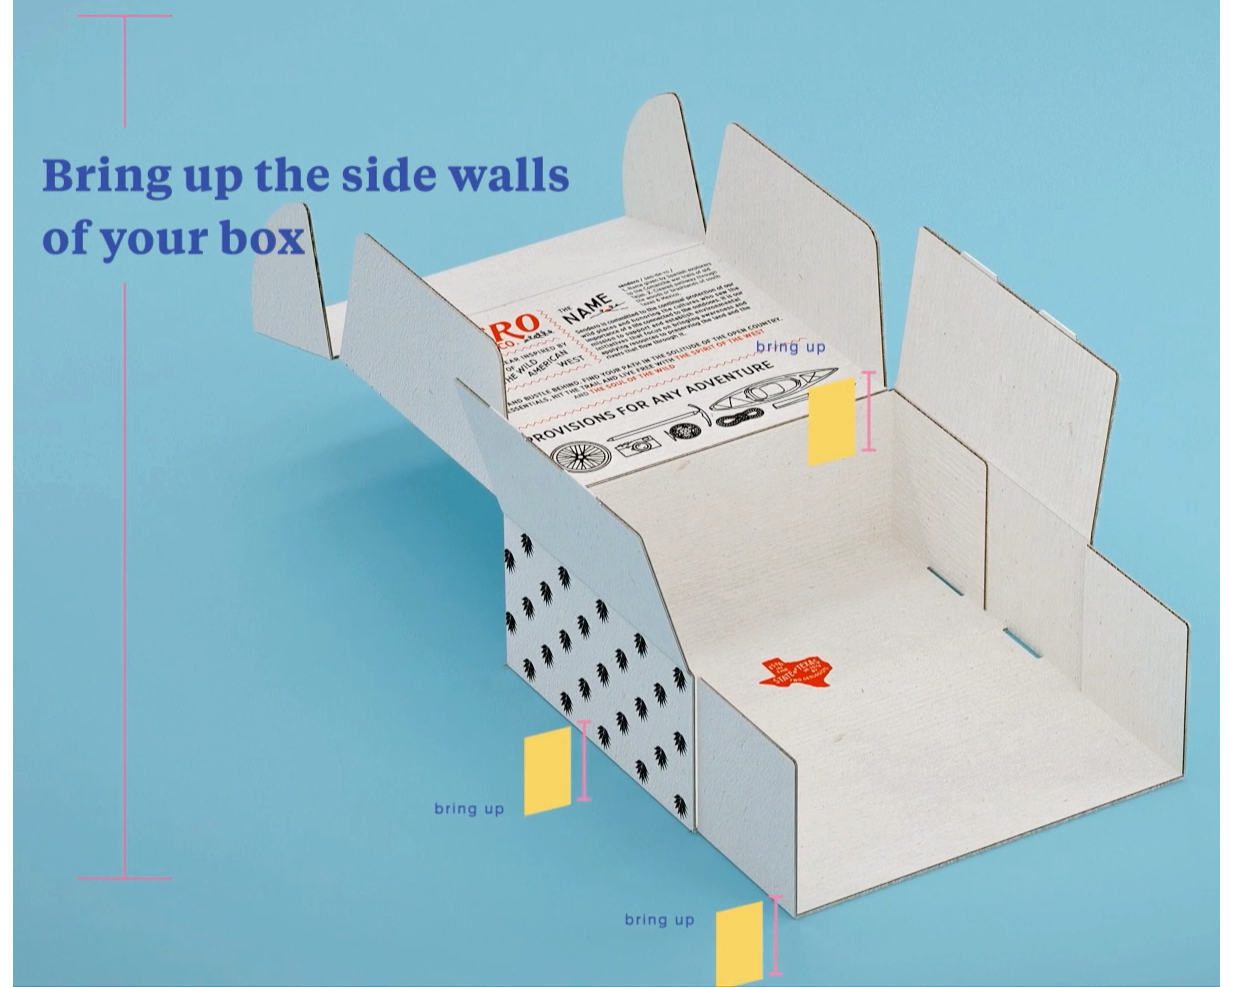
4) Bring up the sides of your box by folding the left and right side flaps up and over the hidden flaps. You can do this on both sides at once, or each side individually.
Then snap each side panel into the holes in the bottom of the box, continuing the same motion. This ensures a very symmetrical, even structure where the sides are equally snug.
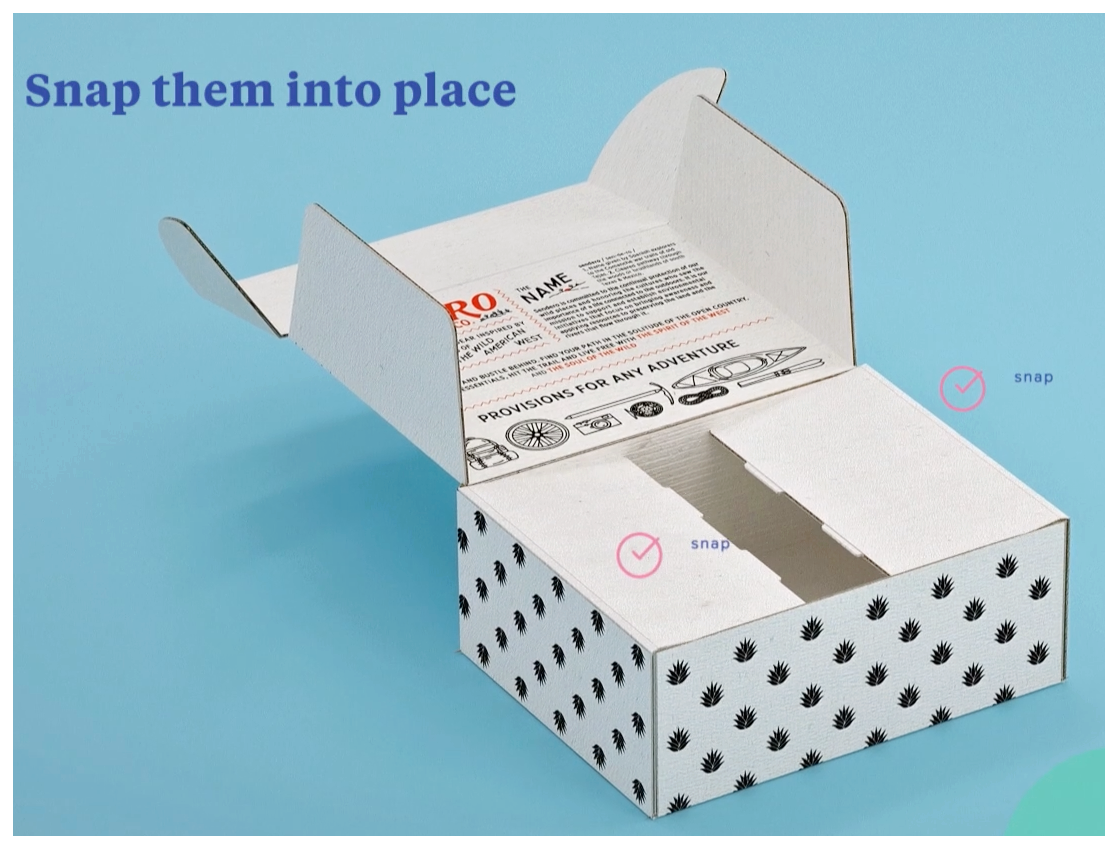
The key to knowing it's right is that the tops of the side walls are flat, not slanted or peaked.
.png)
5) You can now add your contents, close the lid, and slide the locking tabs into the slots in the sidewall. The result should be a sturdy, locked box.
If something feels off or the box isn't closing smoothly, please reach out to us, and we'll be happy to help troubleshoot!